Setup & Configuration
Create, configure, and connect database connections in Chocolate Factory.
For background on what database connectors are and when to use them, see the Overview.
Manage Database Connections
In Chocolate Factory, database connections are managed from the Database & Tools page in the Databases tab. From here you can view all connections, open a connection’s detail page, and see how many agents use each one.
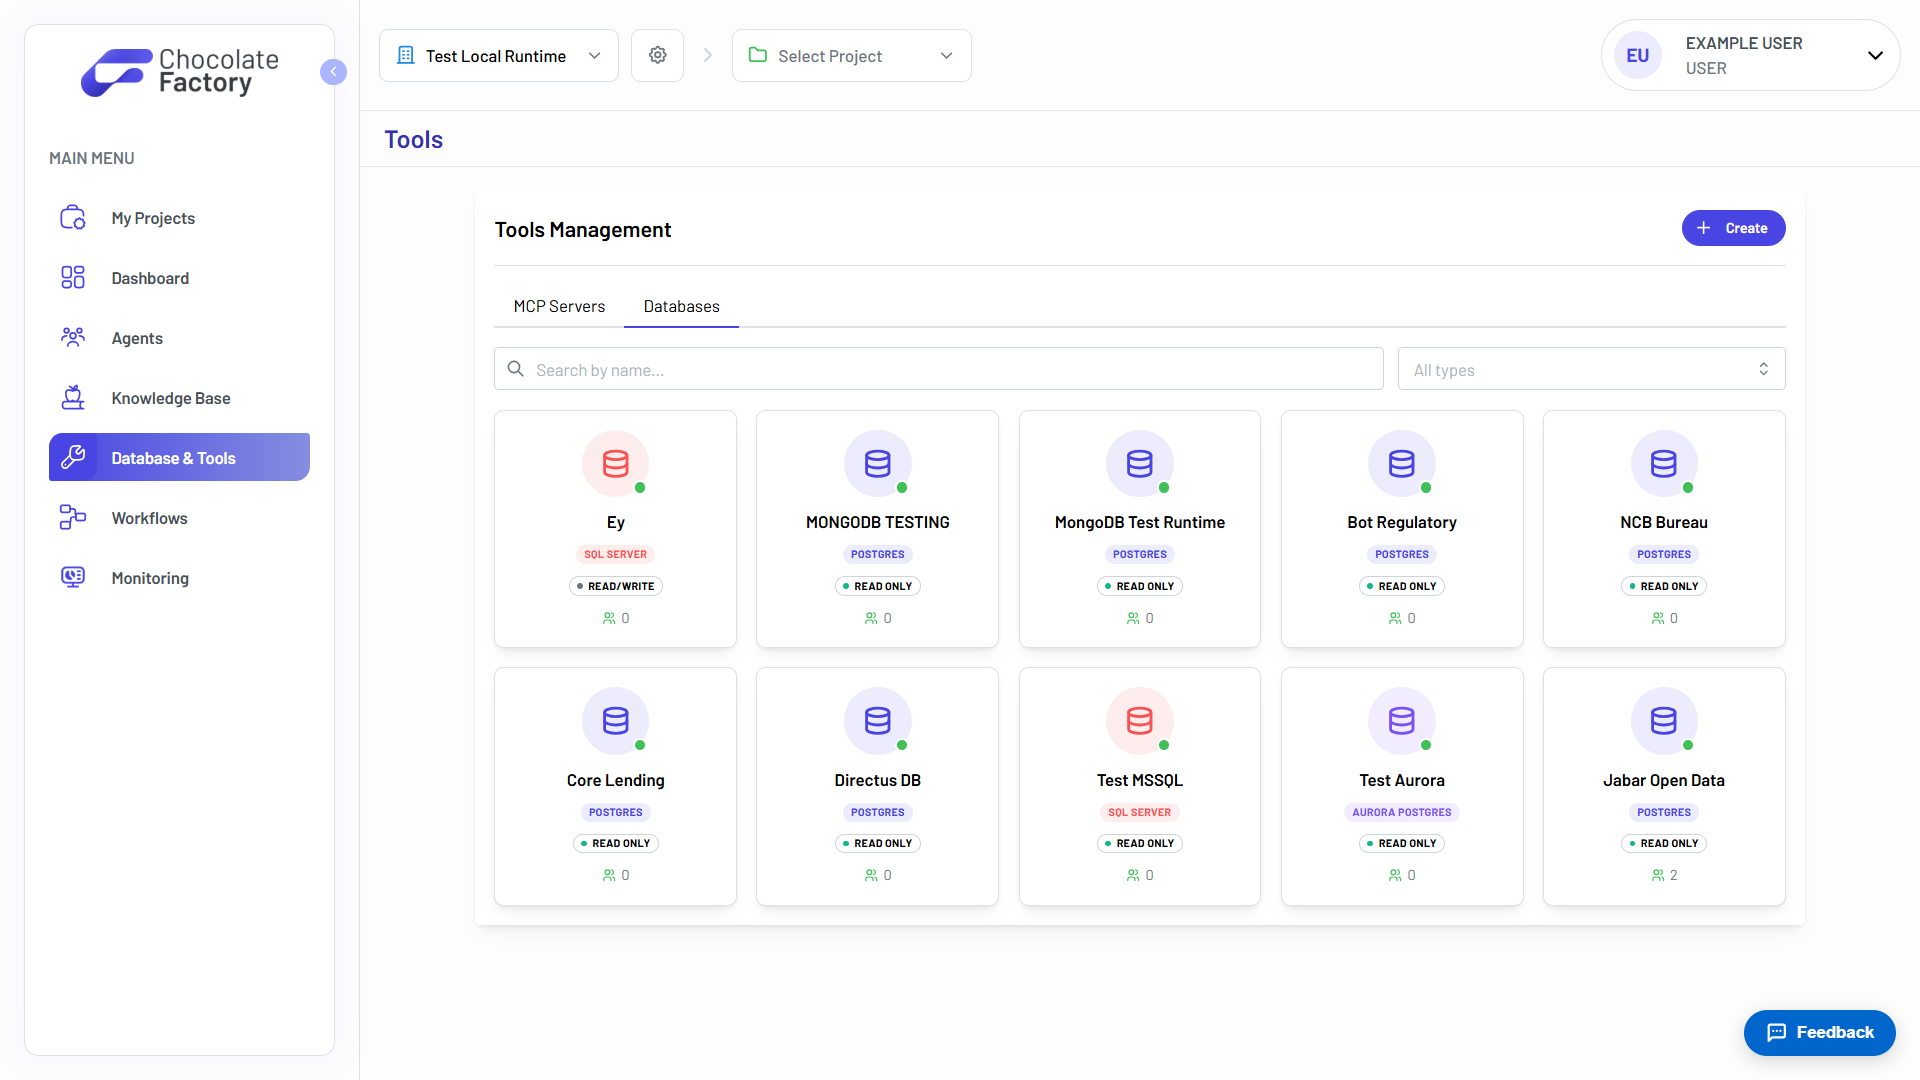
Supported Databases
Chocolate Factory supports the following database engines:
| Database | Auth methods |
|---|---|
| Postgres | Connection string |
| MySQL | Connection string |
| Aurora Postgres | Connection string, IAM |
| Aurora MySQL | Connection string, IAM |
| Microsoft SQL Server | Connection string |
| MariaDB | Connection string |
| Oracle | Connection string |
| IBM Db2 | Connection string |
| MongoDB | Connection string |
Create a Database Connection
To register a new database connection:
- Navigate to Database & Tools and open the Databases tab.
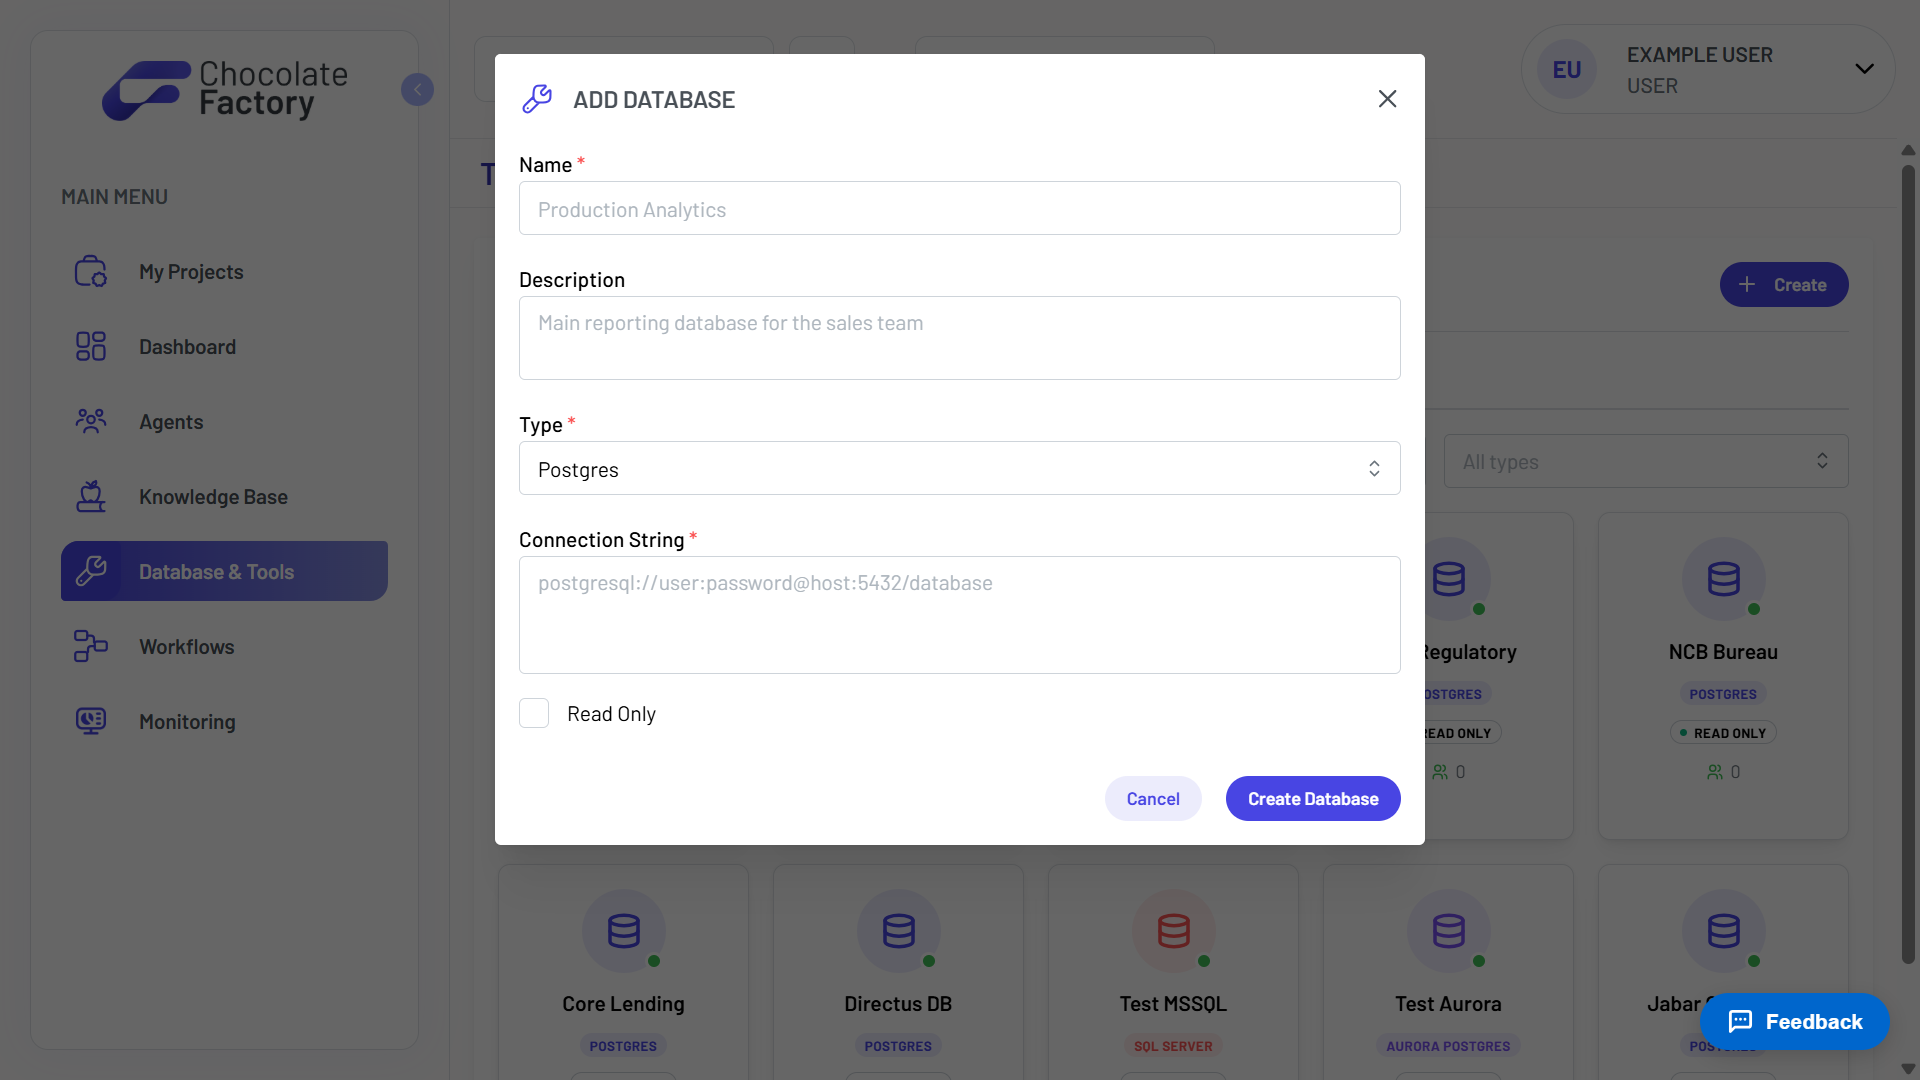
- Click Add Database.
- Fill in the connection details:
- Name → a descriptive name shown in the Tools list and agent configuration.
- Description → optional context about what the database is used for.
- Type → select the database engine. See Supported Databases.
- Connection String or IAM Authentication → provide credentials based on the database type. See Authentication in the overview for supported auth methods.
- Read Only → optionally restrict the connection to read-only queries.
- Click Create Database.
Configure a Database Connection
After a connection is created, open it from the Databases tab to review its status and update settings.
- Open the connection from Database & Tools → Databases tab.
- On the Basic Information tab, click Edit.
- Update the Name or Description, then click Save Changes.
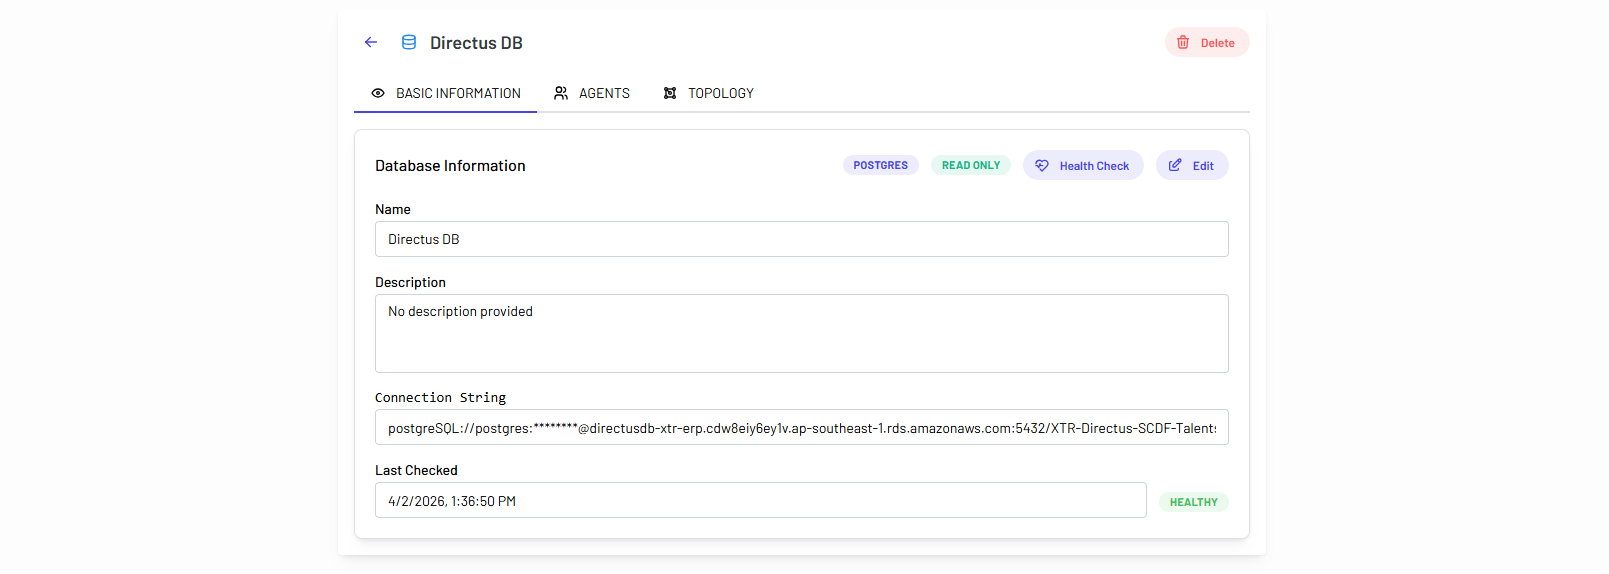
The Connection String (or IAM connection details), Type, and Read Only setting are configured at creation time and cannot be changed from this page.
Health Check
To verify the database is reachable. Status is shown as healthy, unreachable, or unknown.
Topology
The Topology tab lets you discover and document your database structure so agents understand what data is available.
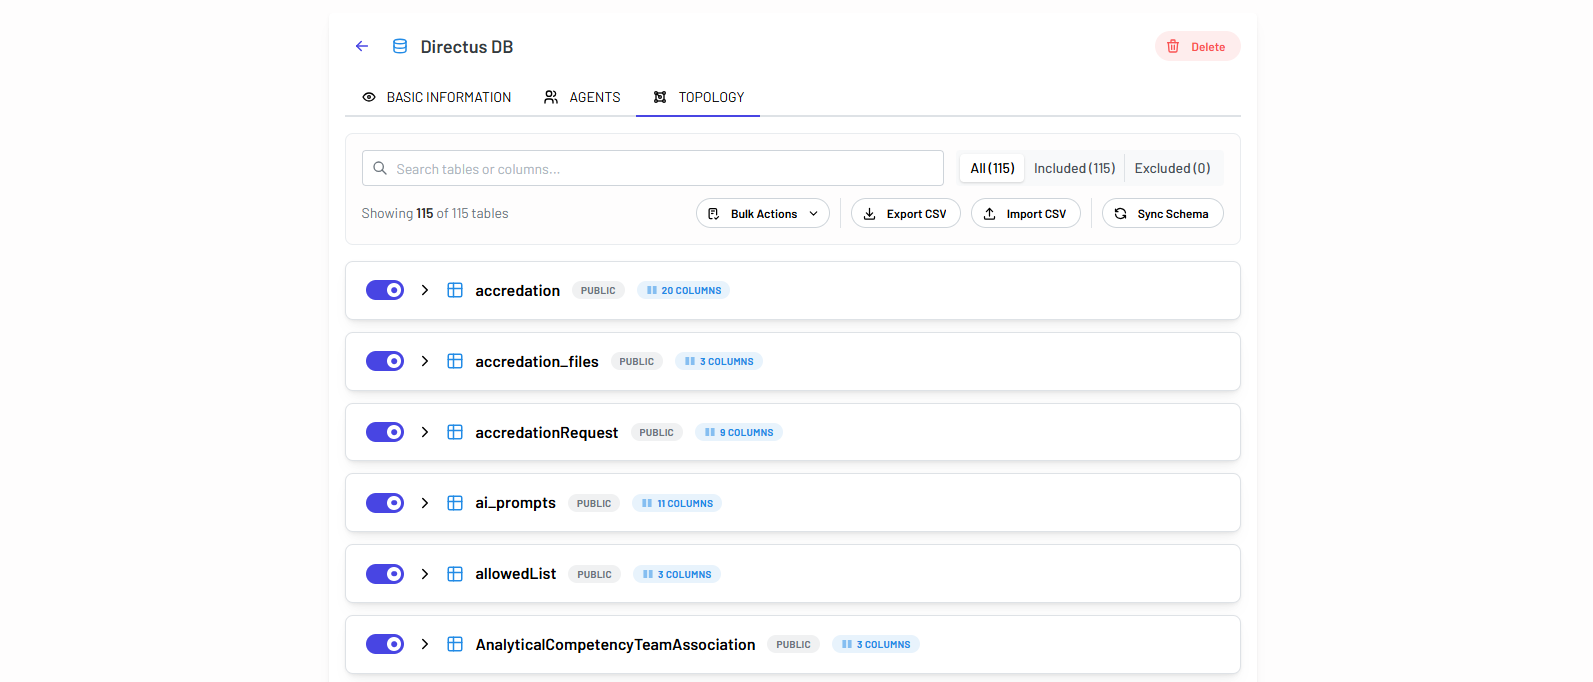
On first visit, click Sync Schema to read all tables and columns from your database. Once synced, you can:
- Browse tables and columns → expand each table to view its fields, data types, and primary keys.
- Add descriptions → click any table or column description to document what it contains. These descriptions are included when agents call
list_tables. - Include or exclude tables → use the toggle on each table to control whether it appears in the agent’s AI context. Excluded tables are not visible to agents.
- Bulk actions → exclude or include multiple tables at once, or filter by schema.
- Export or import CSV → export descriptions to CSV for offline editing, then import them back in bulk.
Re-run Sync Schema whenever your database structure changes. Chocolate Factory updates the topology and cleans up stale descriptions for removed tables or columns.
Connecting Databases to Agents
A database connection must be attached to an agent before that agent can use its tools:
- Navigate to Agent from the main menu → open the agent from Agents Management.
- In the Tools tab, then scroll to the Databases section and click Add Database.
- Click Add on the database connection you want to connect.
- Expand Included Tables on the connected database to review which tables the agent can access.
- Save the agent configuration.
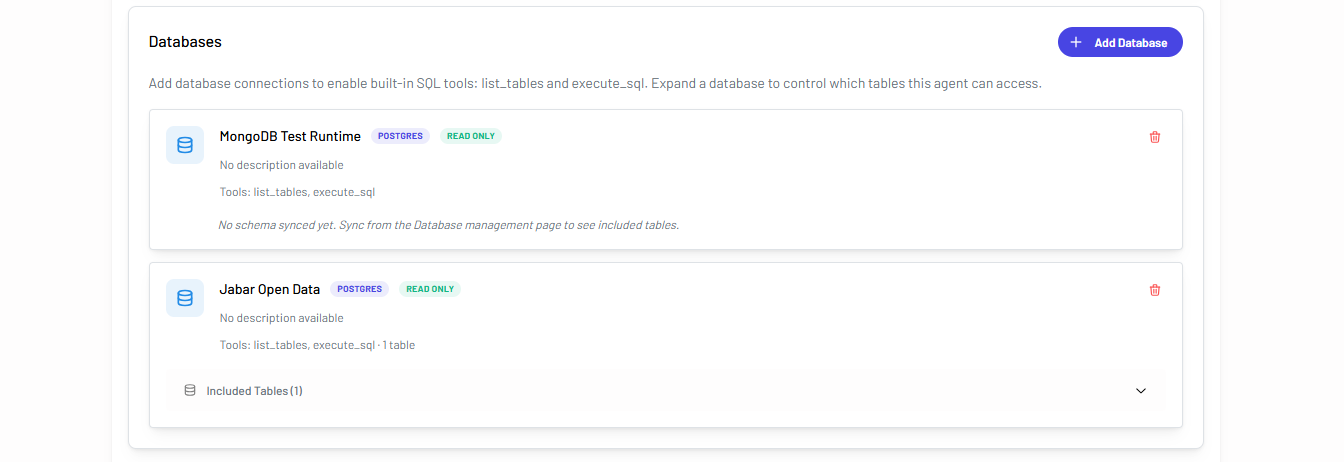
When attached, the agent receives list_tables and execute_sql tools for that connection. Only tables included in the topology (not excluded) are available to the agent. If Read Only is enabled on the connection, the agent cannot run write queries.
See Setup & Configuration for the full agent configuration guide.