Setup & Configuration
Create, configure, and connect shared workflows in Chocolate Factory.
For background on what workflows are and when to use them, see the Overview.
Manage Workflows
Workflows are managed from the Workflows page in the main menu. From here you can view all shared workflows in your organization or project, search by name, and see which agents use each workflow.
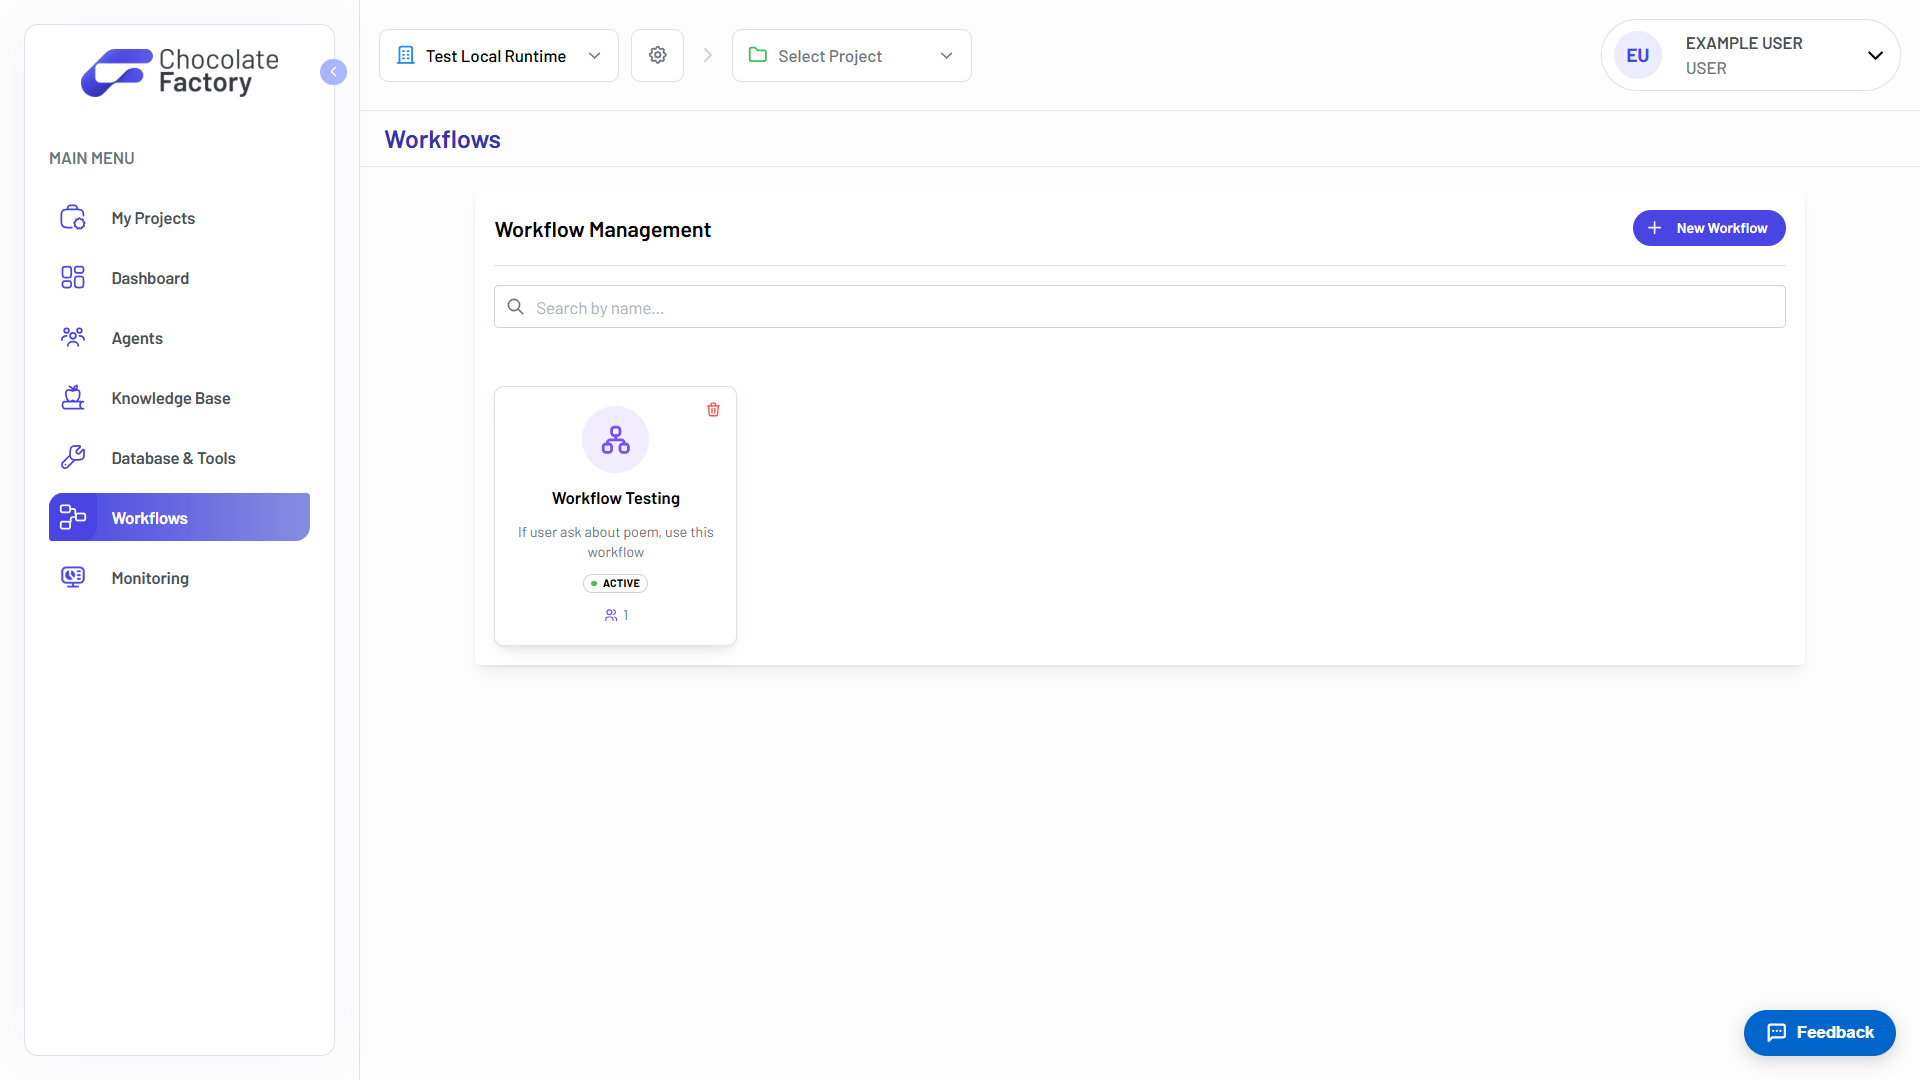
Create a Workflow
To create a new shared workflow:
- Navigate to Workflows in the main menu.
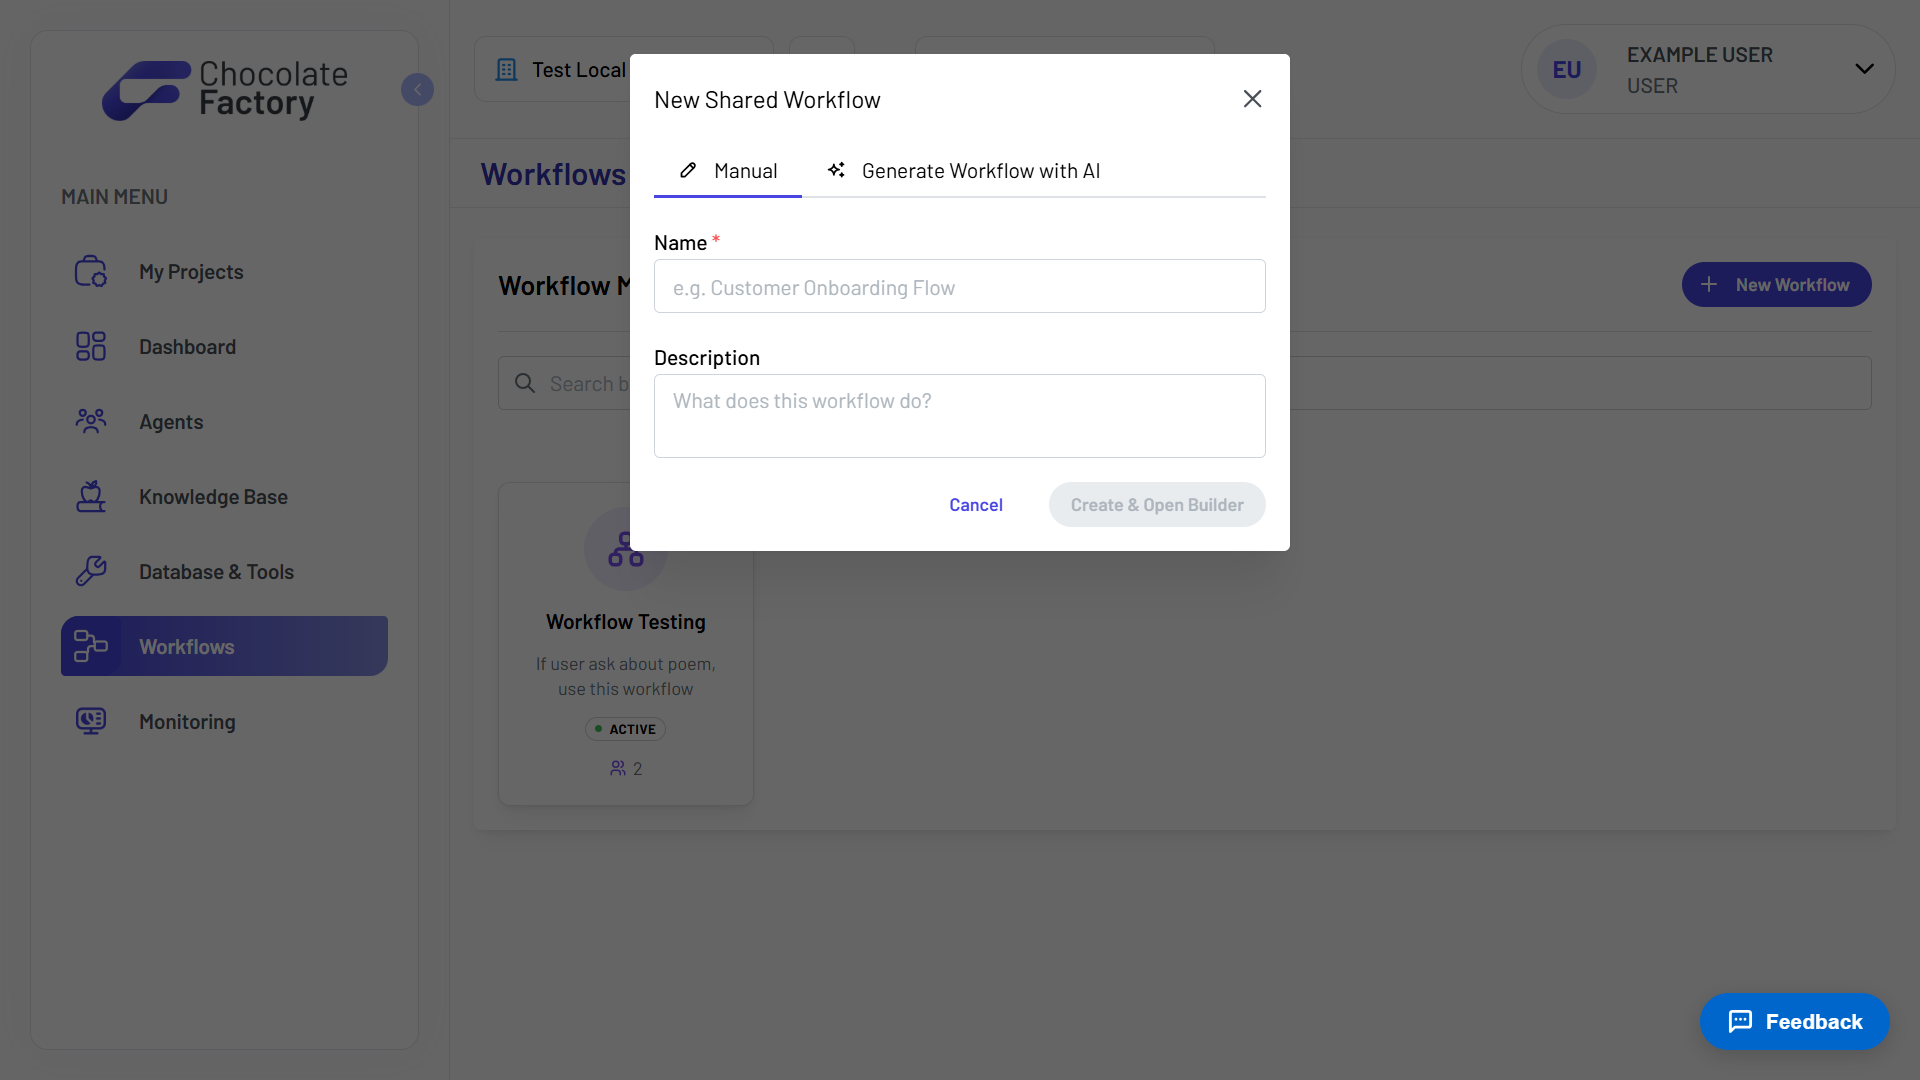
- Click New Workflow.
- Choose how to create it:
- Manual → enter a Name and optional Description, then click Create & Open Builder.
- Generate Workflow with AI → describe what the workflow should do in natural language. The AI generates a complete graph with nodes and connections, using available MCP servers as context when relevant. Click Generate & Open Builder.
- Once workflow created, You will be directed to the Workflow Builder to create the workflow graph.
Configure a Workflow
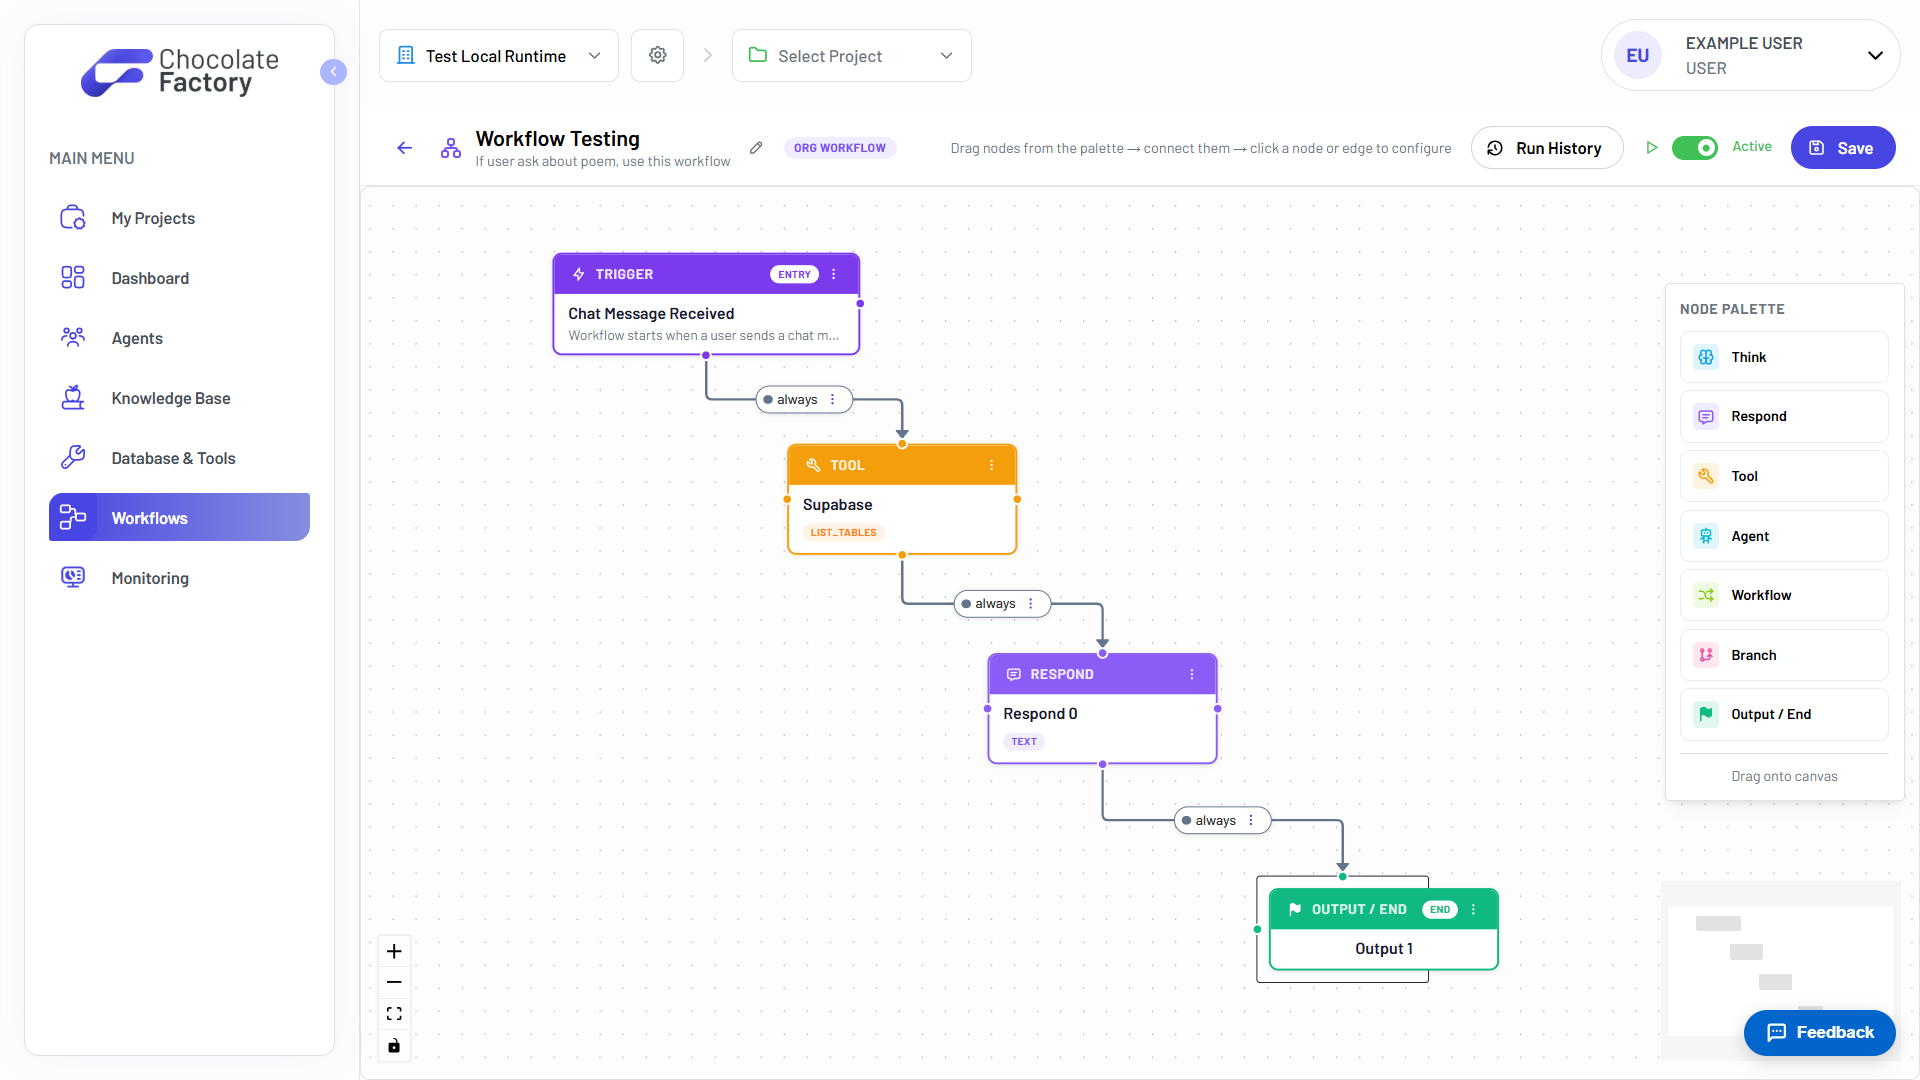
The Workflow Builder is a visual canvas where you design your process. Drag nodes from the palette, connect them, and click a node or edge to configure its settings.
Node types
| Node | Description |
|---|---|
| Trigger | Starting entry point of the workflow from a chat message. |
| Think | LLM reasoning step with no external tool call. |
| Respond | Send an intermediate message to the user. |
| Tool | Invoke a built-in tool, MCP tool, or database query. |
| Agent | Delegate to another agent and use its response. |
| Branch | Route the flow based on conditions. |
| Workflow | Run a sub-workflow and pass output downstream. |
| Output / End | Terminal node that produces the final result. |
| Delay | Pause execution for a set duration (up to 30 seconds). |
Activating Workflows
- Click Save to persist changes. Each save increments the workflow version.
- Toggle Active in the header to enable or disable execution. Only active workflows can run when invoked by an agent.
You can also edit the workflow name and description from the builder header.
AI-generated workflows are a starting point. Review and adjust nodes, connections, and parameters in the builder before activating and attaching to agents.
Run History
Click Run History to review past executions triggered by agents using this workflow.
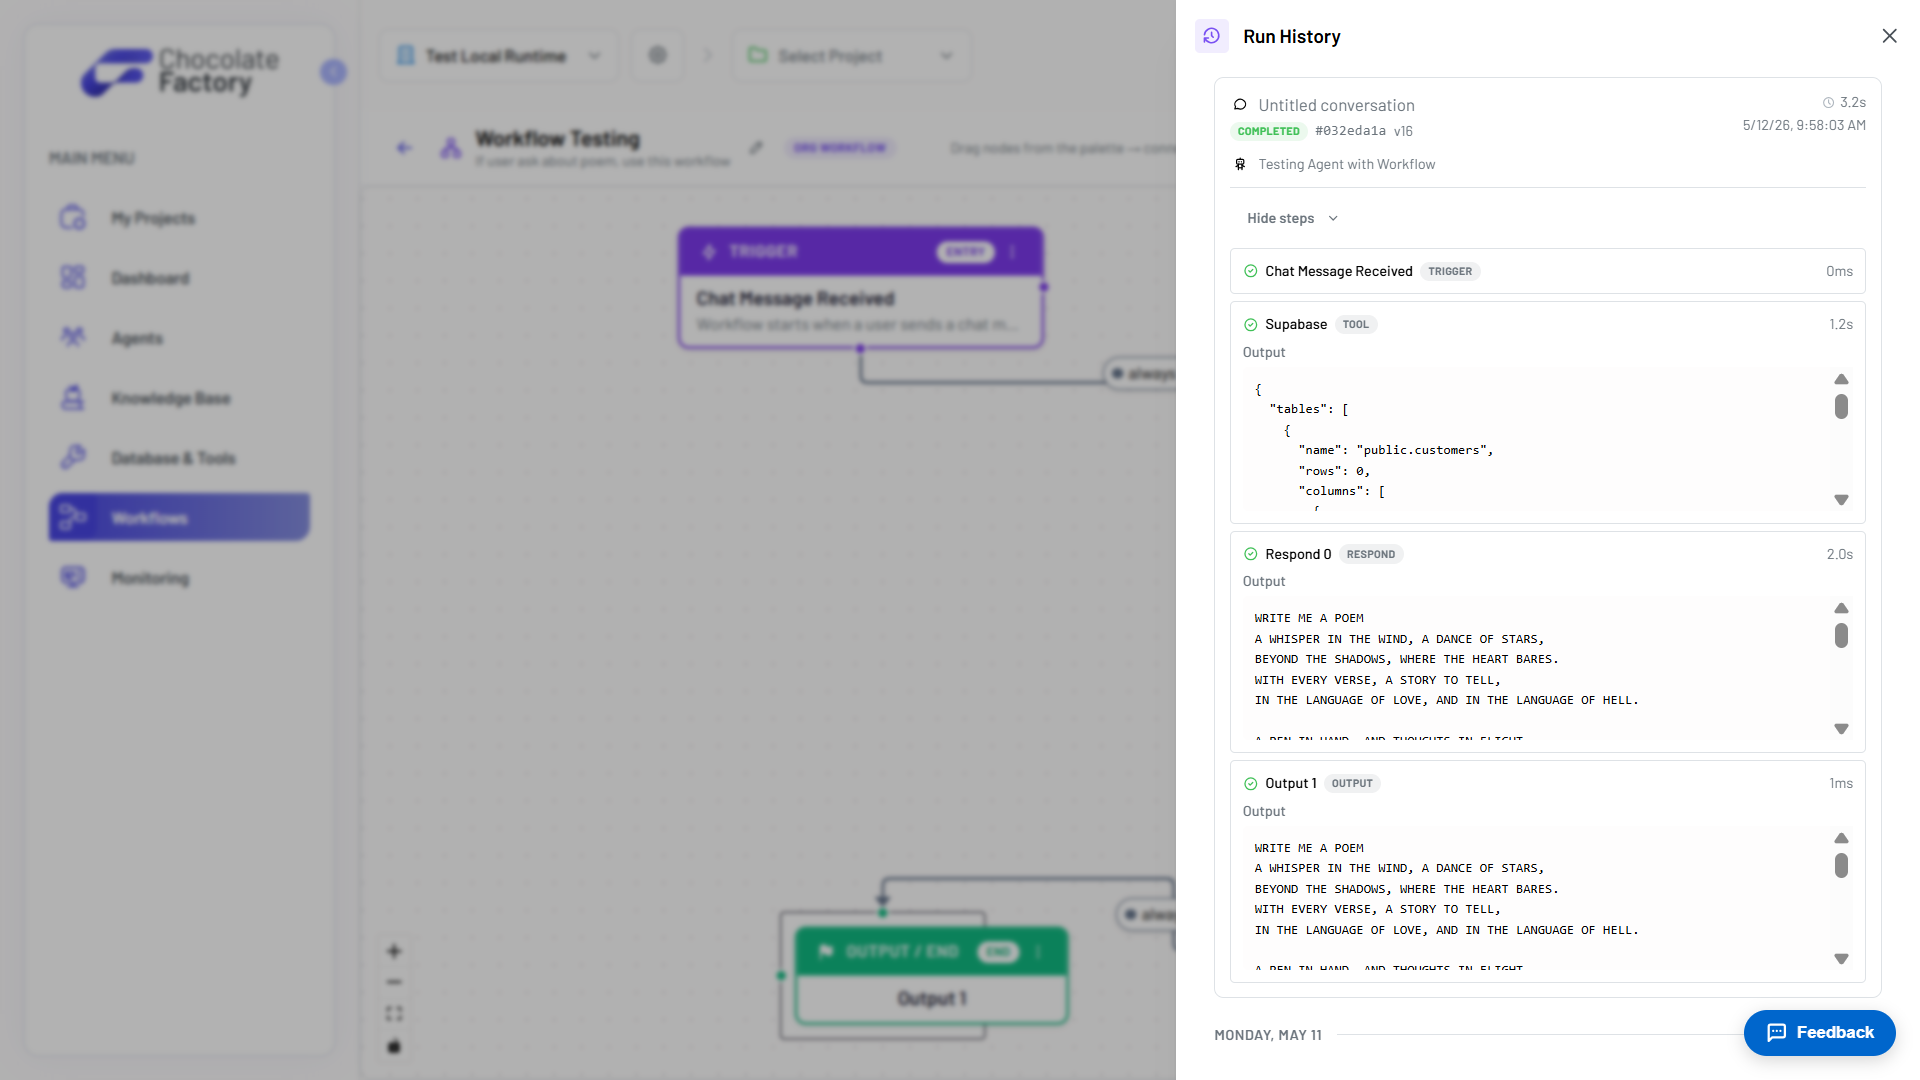
Each run shows the conversation, agent, status, duration, and a step-by-step execution log. Expand a run to see individual node outputs, errors, and timing, which is useful for debugging failed or slow workflows.
Connecting Workflows to Agents
A workflow must be attached to an agent before that agent can invoke it during a conversation:
- Navigate to Agent from the main menu → open the agent from Agents Management.
- In the Tools tab, then scroll to the Shared Workflows section and click Add Workflow.
- Click Add on the workflow you want to connect.
- Save the agent configuration.

The workflow must be Active to execute. Attached workflows appear under Shared Workflows on the agent configuration page. Click the workflow name to open it in the builder.
See Setup & Configuration for the full agent configuration guide.